-

-

-
 Make your Applications Compliant
 -
 Secure Multiple ApplicationsManage data access rights across all applications
Control and audit all systems in real time
Secure all type of applications : Desktop, Web, Mobile, SaaS...
Support all development languages: .NET, Java, Javascript, PHP... -
 Security Framework for Application DevelopersAdd security features to your applications

Visual Guard Core Features
Control access to sensitive data inside your applications
Define which DATA and FEATURES users can access in your applications. Grant permissions in a graphical console, independent from your Code.
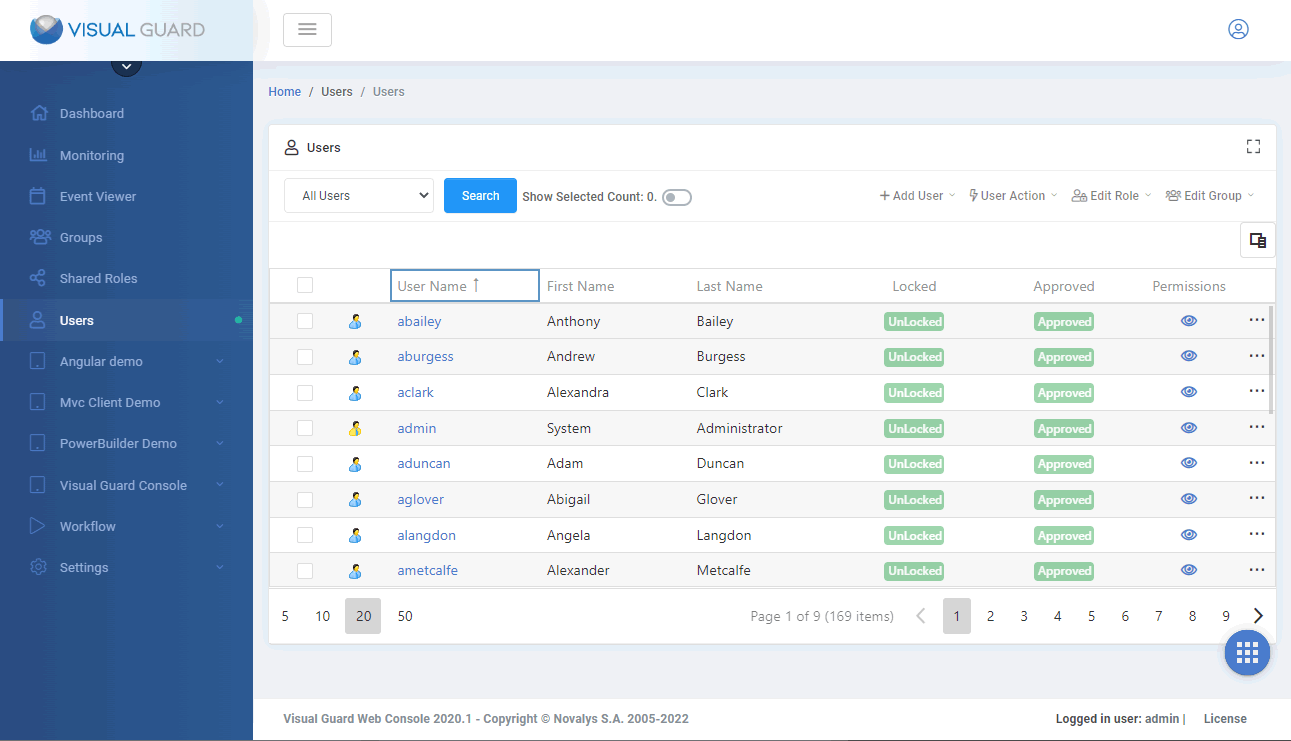
Grant access rights to users and groups
Powerful user account management features and user-friendly administration console for user provisioning and management.
Log data processing via the application
With Visual Guard you know exactly who did what in your application
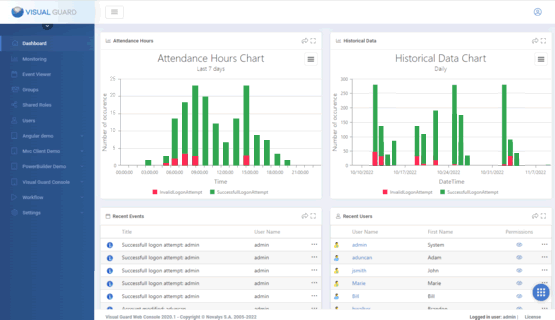
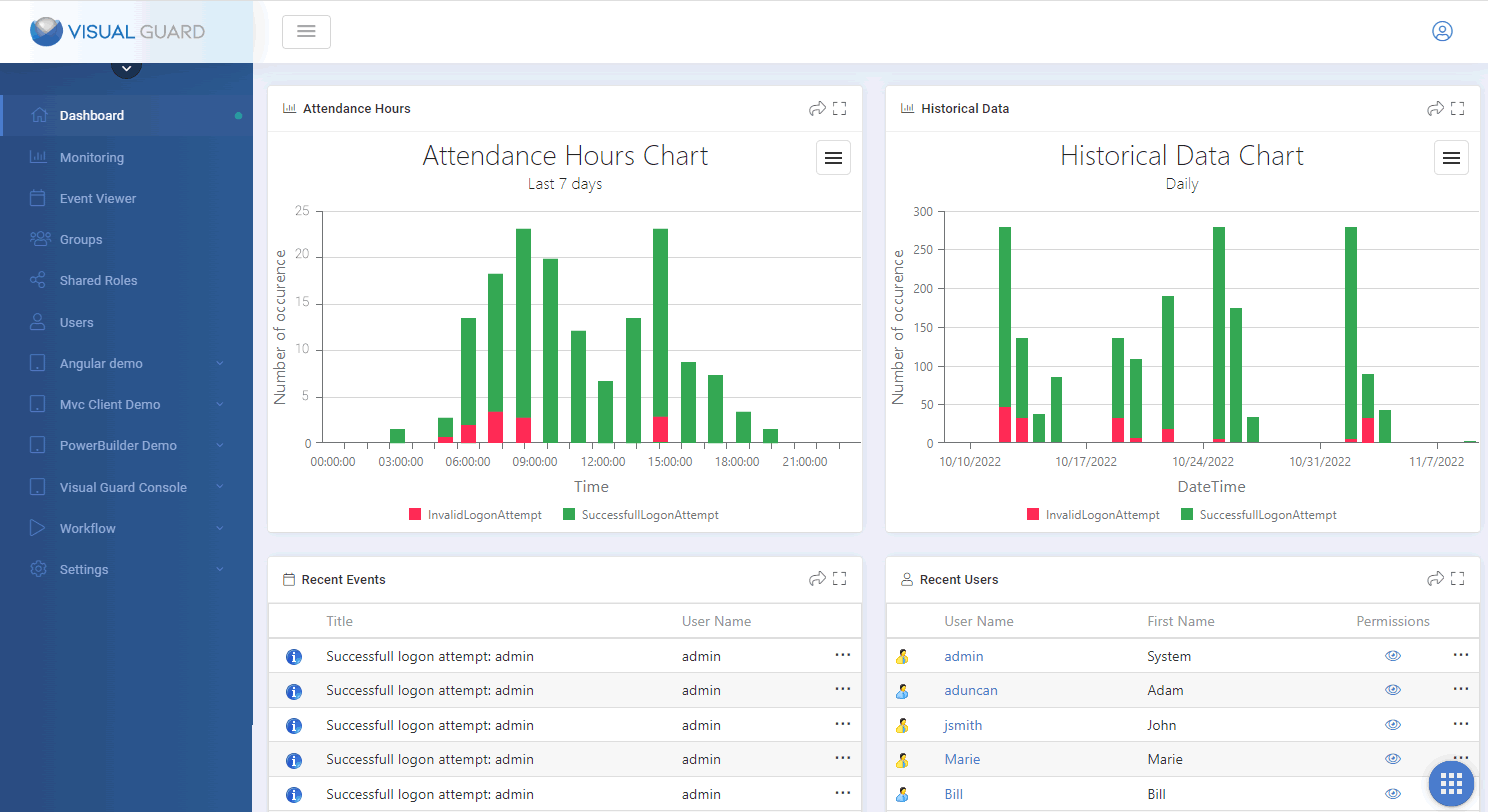
Monitor and Audit sensitive activities
Monitor activities in real-time and review historical graphs.
Send email notifications on important events
Determine which events require special monitoring and Visual Guard will automatically send email notifications when they are triggered.
Detect data breaches
Review sensitive operations, detect suspicious activities, send email alerts and generate a comprehensive list of data illegally processed.
Implement Strong Authentication (Multi Factor Authentication)
The only MFA solution combining high level of security and ease of use
Audit & Traceability
Log and audit sensitive operations performed within your applications.
Visual Guard keeps track of sensitive actions in a secured repository. You can then audit the security of your applications whenever required, send alerts by email, monitor critical activities in real time, generate graphs and reports...
Visual Guard also helps comply with regulations like GDPR, FIPS, HIPAA, SOX, ISO...
GDPR COMPLIANCE FOR BUSINESS APPLICATIONS
You may have heard of the General Data Protection Regulation, but do you know if your applications are impacted? Do they have to be modified? If so, how?
Security Framework
Do not reinvent the wheel
Visual Guard exposes an extended API (over 300 methods) to add security features to your applications
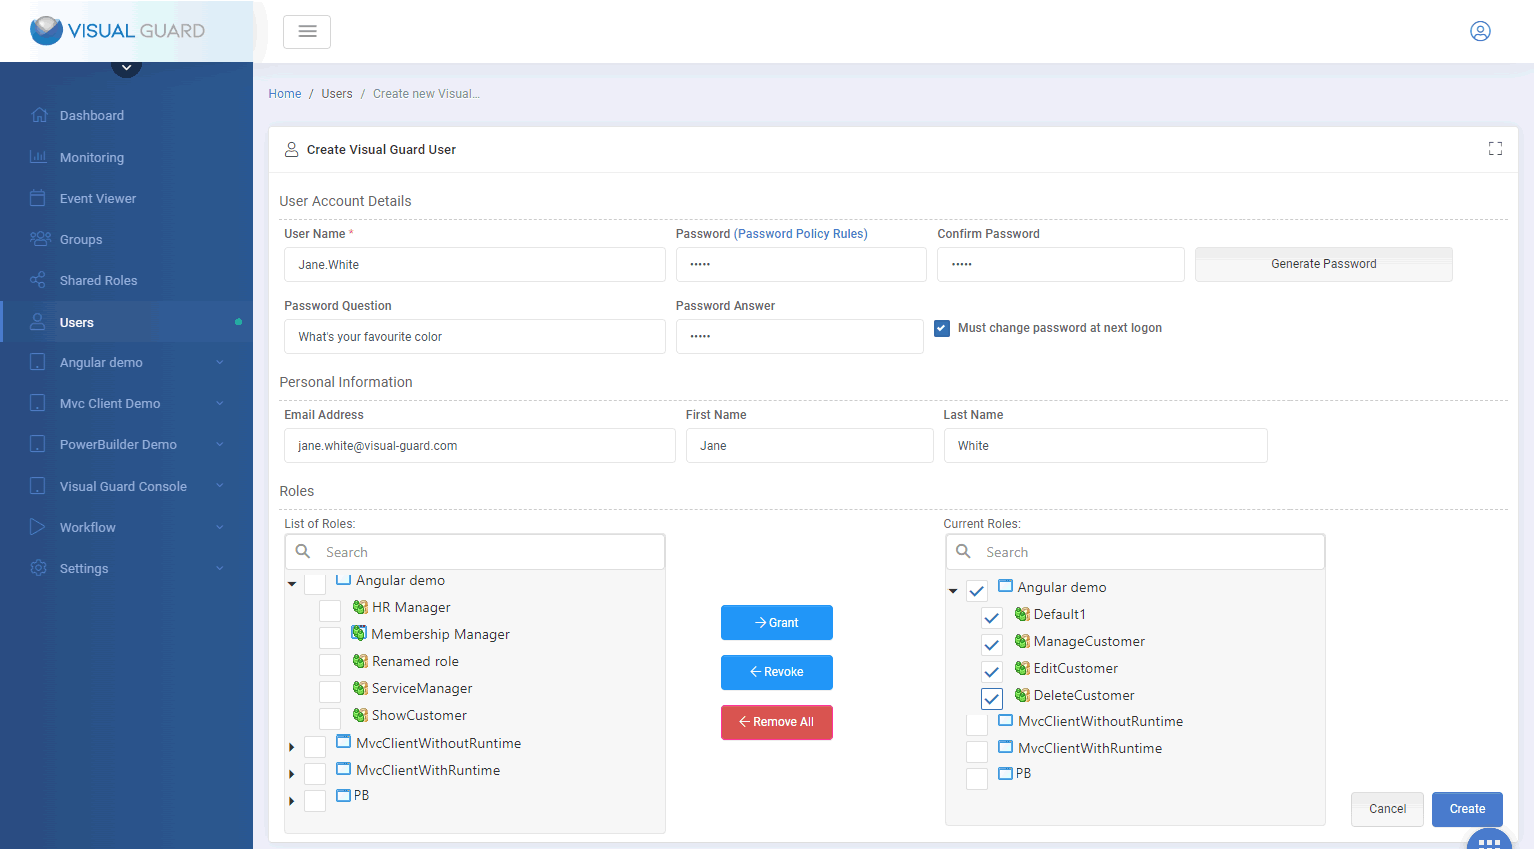
Manage Users
- Create, Read, Update and Delete Login/passwords accounts
- Edit user accounts attributes
- Declare Active Directory accounts
- Define a password Policy
- User self-service (reset password, lost password, self registration…)
Manage Permissions
- Create, Read, Update and Delete Permissions, Permission Sets and Roles
- Add or Remove Permission in Permission sets
- Add or Remove Permission sets in Roles
- Grant or Revoke Roles to Users
- Grant or Revoke Roles to Active Directory Accounts
Enforce Security
- Authenticate Users (Windows authentication, Login form, SSO, Strong Authentication/MFA…)
- Load and apply user permissions
- Supports Winforms, WPF, Webforms, MVC, Web Services, WCF
- Easy integration with other tools
20 years of Application Security Expertise
Visual Guard was initially developed in the 90's for a major banking institution. Since then, it has constantly evolved to comply with modern security requirements. It is now used by medium and large organizations, as well as many software vendors throughout the world.
Consulting - Assistance - Support
Novalys can help you put your application security in place. Our team offers the following services.
Functional and technical specifications
Analysis of existing applications, Interviewing users on security management rules, definition and attribution of permissions and user roles, definition and repartition of administration privileges, proposition of global or local organization of application security.
Development
Integration of Visual Guard in your applications, securing complex objects (Web services, classes…), development of specific components or adaptation of Visual Guard components to respond to complex functional or technical specifications.
Production
Installation and configuration of VG with ADFS, Installation and configuration of Web SSO with Visual Guard, Creation of a deployment procedure for security in production.
Support
Benefit from a consistent and seamless experience from implementation to production thanks to Visual Guard Professional Support Team.

Pre-sales and post-sales can be two very different things... I had a very uniform experience thanks to Anne
The support provided by Novalys has been excellent and very quick
Feedback from our clients

Full featured and reliable IAM solution
Simple, robust, full featured client
Professional Support
The support provided by Novalys has been excellent and very quick
Separate Security Development and Daily Management
Thanks to the Administration Console (and the different available roles) it is very easy to give the ability to create roles and users to business administrators and divide the tasks between the development team and the administrators.
Centralized Security Hub
The most important benefit of VG is that we have a central place to manage the authentication and the authorizations for all the company
Time Saving
A physician's primary goal is to give treatment not to remember their passwords [...] I think I'm saving 50% of time in such menial tasks like resetting passwords.