| Visual Guard .Net allows you to
create new role for restricting user or allowing them access. |
| Note:
|
You will be allowed to
create the permissions only if you have been assigned the
privilege. Refer special roles section for
more details on privilege |
|
|

|
You can assign a permission set directly to a role
by drag & and drop |
|
|
You can directly revoke a permission set by
selecting it and pressing the delete key |
|
| Follow the steps below to create a role: |

|
Login to the Repository and select the
Application name under which the permission(s) is
to be created. |
|
|
|
| |
Screen Display |
|
|
|
| |
|
|
|
|
|
|
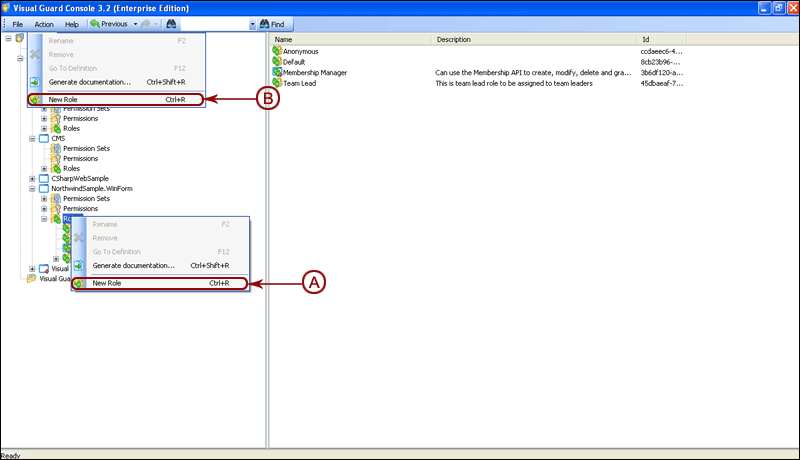
Access the New Role option using one of the
options below: |
| |

|
Right click on the Application > Roles and
select the New Role menu (A) from
the popup menu. |
| |
|
|
|
Select the Repository > Application >
Roles from the Left Navigation Panel and select the
New Role menu from the Action menu
(B). |
| |
|
|
|
|
|
|
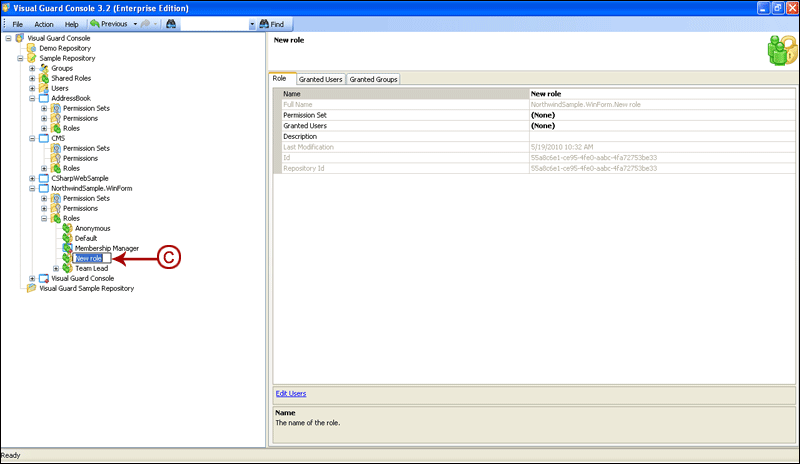
The new role will be created under the Roles
folder as shown below: |
|
|
|
| |
Screen Display |
| |
|
|
|
|
|
|
As the new role is created, it will be in editable mode for
renaming (C). You can rename the new role. |
|
|
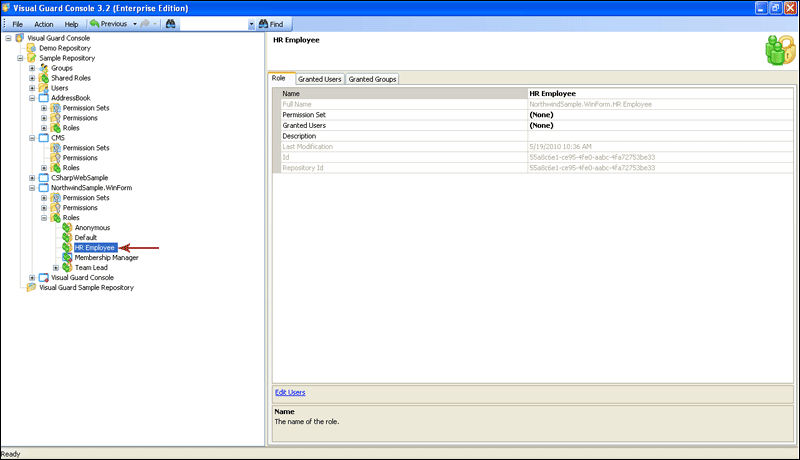
The renamed role will be displayed as shown below: |
|
|
|
| |
Screen Display |
|
|
|
| |
|
| |
| |
| See Also: |
|
|
| |
|
|
| |
| |
|


 Top
Top