
|
Open your application in Visual Studio. The below screen will
be displayed. |
|
|
|
| |
Screen Display |
|
|
|
| |
|
|
|
|
|
|
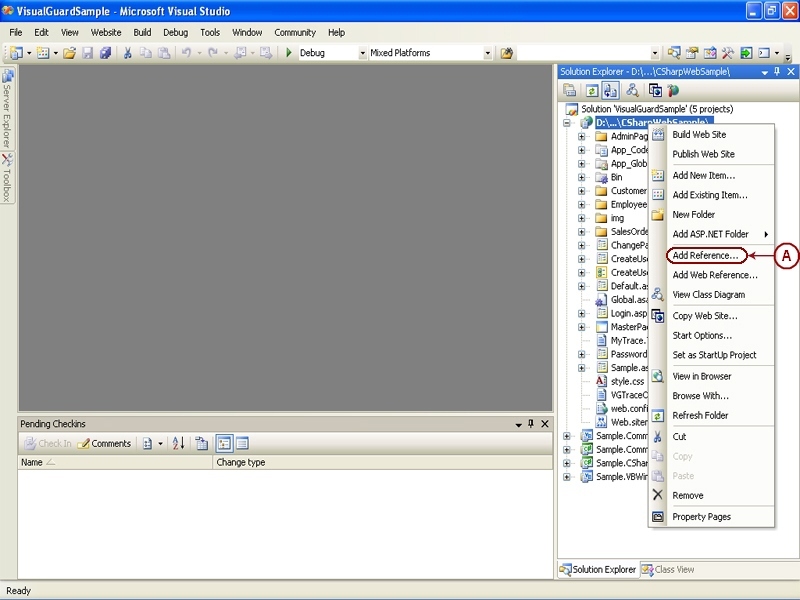
Expand the project node in the solution
explorer. |
|
|
Right click on the project node and select the
Add Reference option (A) from the
popup menu. |
|
|
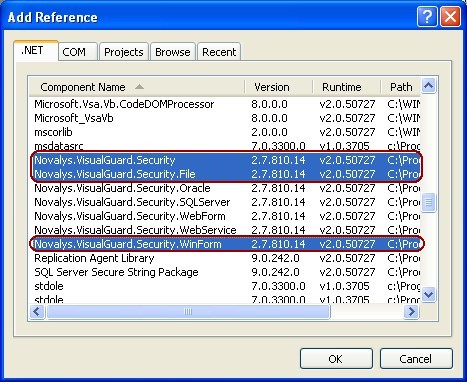
The Add Reference screen will be displayed as
shown below. |
|
|
|
| |
Screen Display |
|
|
|
| |
|
|
|
|
|
|
| From the tab
select the 3 assemblies named
Novalys.VisualGuard.Security and
Novalys.VisualGuard.Security.WinForm. The third
assembly depends on the type of the repository. You can choose
between Novalys.VisualGuard.Security.File or
Novalys.VisualGuard.Security.SQLServer or
Novalys.VisualGuard.Security.Oracle. |
|
|
|
From the  tab select the 3 assemblies named
Novalys.VisualGuard.Security,
Novalys.VisualGuard.Security.WinFrom,
Novalys.VisualGuard.Security.File. tab select the 3 assemblies named
Novalys.VisualGuard.Security,
Novalys.VisualGuard.Security.WinFrom,
Novalys.VisualGuard.Security.File. |
|
| |
|
|
| You can choose between
Novalys.VisualGuard.Security.File or
Novalys.VisualGuard.Security.SQLServer or
Novalys.VisualGuard.Security.Oracle. |
|
| |
|
|
Click  to continue or click to continue or click  to cancel the selection. to cancel the selection. |
|
|
On clicking the assemblies will be added. |
|
|
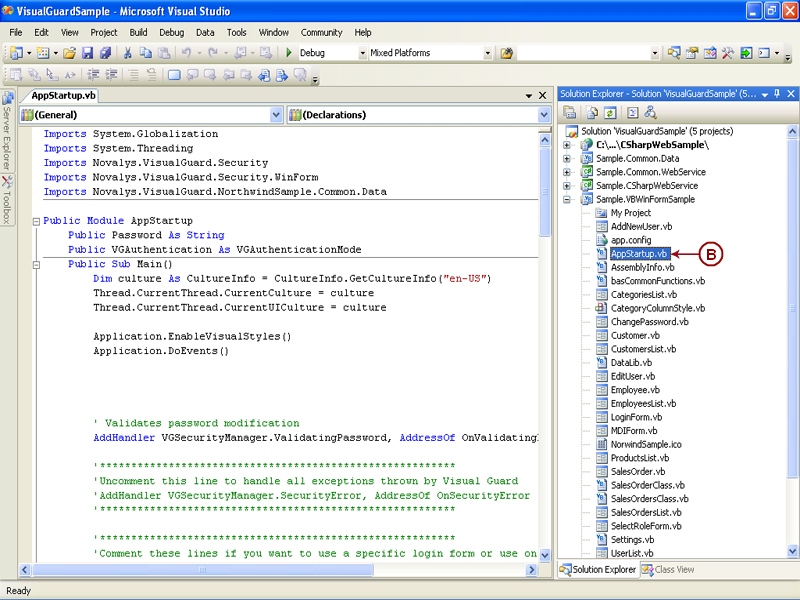
| After the assemblies are added,
double-click on the AppStartup.vb file if your
application is developed in VB.Net or
AppStartup.cs file if your application is
developed in CSharp to open from the solution
explorer (B). |
|
|
|
|
| |
Screen Display |
|
|
|
| |
|
|
|
|
|
|
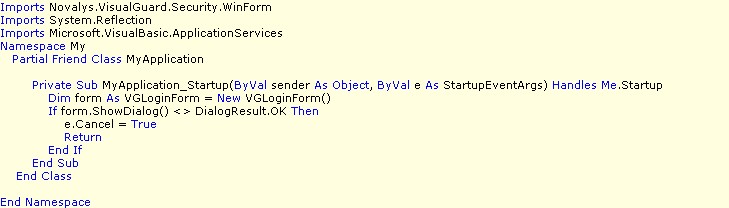
Enter the following code above the
AppStartup.vb or AppStartup.cs
file for authenticating users. |
|
|
|
| |
|
|
|
|
|
|
Enter the below code, if you are using the default login form
provided by the Visual Guard. |
|
|
|
| |

|
|
|
|
| |

|
|
|
Once the above codes are entered, save the
AppStartup.vb or AppStartup.cs
file. |
|
|
|

