|
| Access the VG WIn
Console application using the path Start > All Programs > Novalys > Visual Guard for
.Net > Visual Guard Console |
|
| |
|
|
The VG Win console will open as
shown below. |
|
|
|
| |
Screen Display |
|
|
|
| |
|
|
|
|
|
|
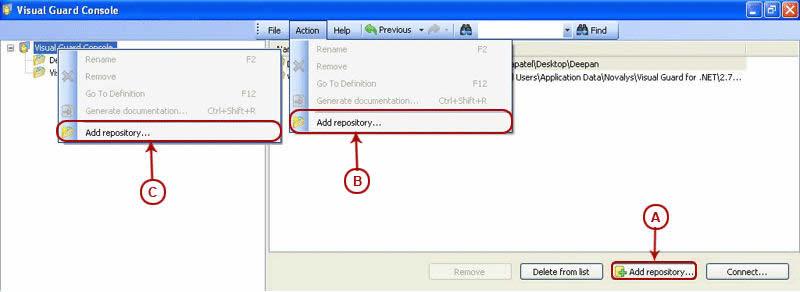
Access the Add Repository option
using one of the options below: |
| |

|
Click  . (A) . (A)
|
| |
|
|
|
Select Add repository option from Action
Menu. (B)
|
|
|
| |
|
|
|
Select Add repository option from
File Menu.
|
| |
|
|
|
Right click on the 'Visual Guard
Console' in the Left Navigation Panel and select
Add repository option from the Popup Menu.
(C) |
| |
|
|
|
|
|
|
The Repository Creation Wizard
screen will be displayed as shown below: |
|
|
|
| |
Screen Display |
|
|
|
| |
|
|
|
|
|
|
The wizard will automatically walk you through the
repository creation. |
|
|
Click  to access the
Next screen. to access the
Next screen. |
|
|
|
| |
Screen Display |
|
|
|
| |
|
|
|
|
|
|
Select the highlighted option (A)
from the screen to create a repository using an existing
repository. |
|
|
Click to select repository
type. |
|
|
|
| |
Screen Display |
|
|
|
| |
|
|
|
|
|
|
Select option (A) from the screen
to create a SQL Server Repository. |
|
|
| Click to specify the SQL Server name
as well as the username and password required to access the
repository; the following screen will be displayed. |
|
| |
|
|
|
| |
Screen Display |
|
|
|
| |

|
|
|
|
|
|
Specify the server location in the option (A). You
can specify either the IP Address or the
Server Name This
server contains the objects of the database necessary to store the
Visual Guard repository. |
|
|
Select the Authentication Mode
(B). |
|
|
| Two types of authentication modes are available namely
SQL Server Mode and
Windows Authentication Mode
(B). |
|
| |
|
|
|
| |
Screen Display |
|
|
|
| |
|
|
|
|
|
|
You can use either authentication
types. Specify the username and password that will be used to
connect to the server. |
|
|
Select the database where this repository is to be
created by using option (A). |
|
|
The database will be same where the existing
repository is stored. |
|
|
The Authentication Mode selected
for the existing repository will automatically be used for the new
repository. |
|
|
Click  to complete the Repository Creation
Process. to complete the Repository Creation
Process. |
|
|
Visual Guard will automatically
use the Repository Name used last to create the repository. |
|
|
You can rename the repository on the
Visual Guard Console once the creation process is
complete. |
|
|
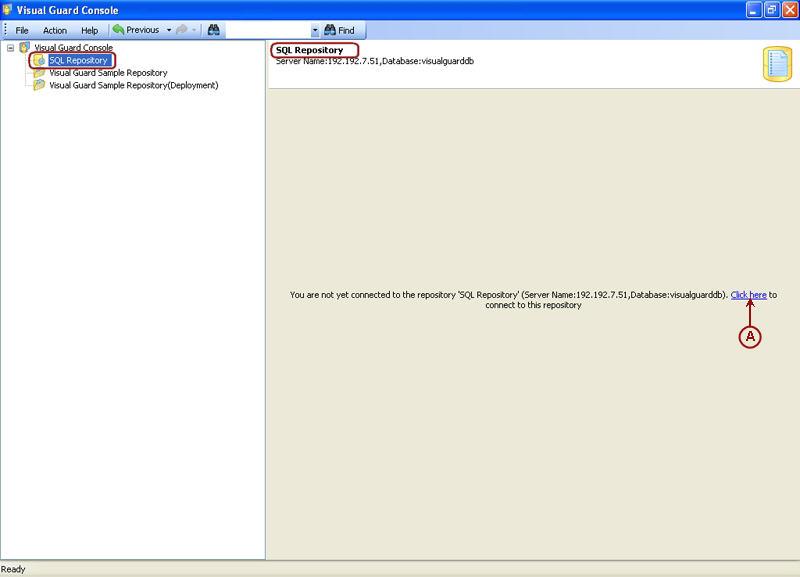
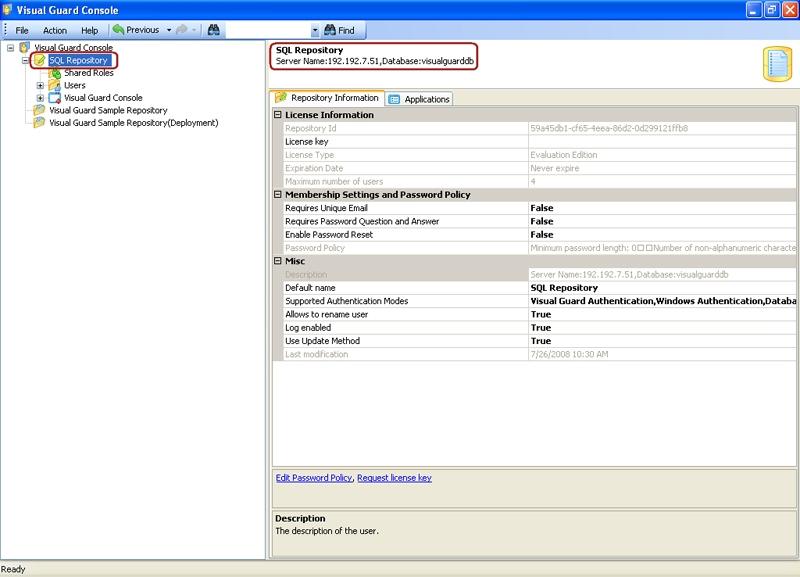
The Repository will be displayed in the
Left Navigation Panel as well as the Main
Section on the Visual Guard Console. |
|
|
|
| |
Screen Display |
|
|
|
| |
|
|
|
|
|
|
To access the repository, click on option
(A). |
|
|
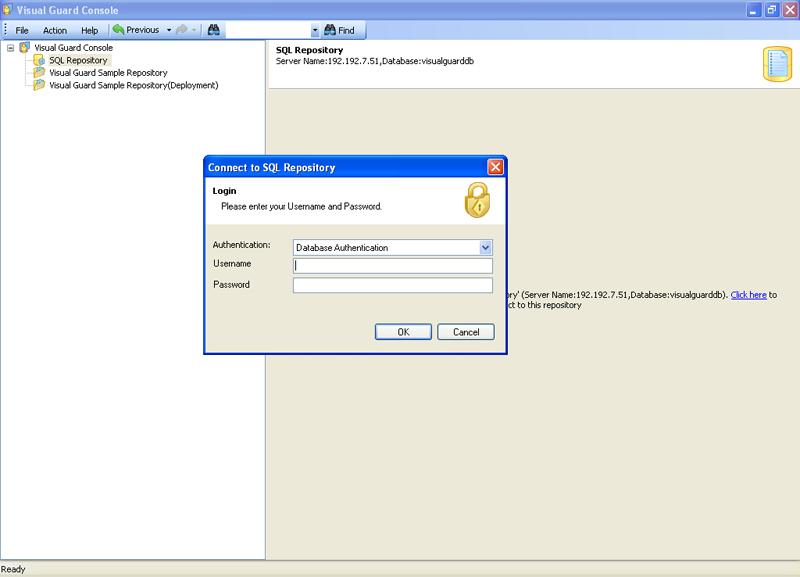
The following screen will open and allow you to
authenticate and access the repository. |
|
|
|
| |
Screen Display |
|
|
|
| |
|
|
|
|
|
|
Select the Authentication Mode
and specify the username and password. |
|
|
The following repository related details will be
displayed in the main area. |
|
|
|
| |
Screen Display |
|
|
|
| |
|
|
|
|
|
|
|