 |
Access the VG Win Console application using the path Start > All Programs > Novalys > Visual Guard > Visual Guard Console |
|
The VG Win Console will open as shown below. |
|
|
| |
Screen Display |
|
|
| |
 |
|
|
|
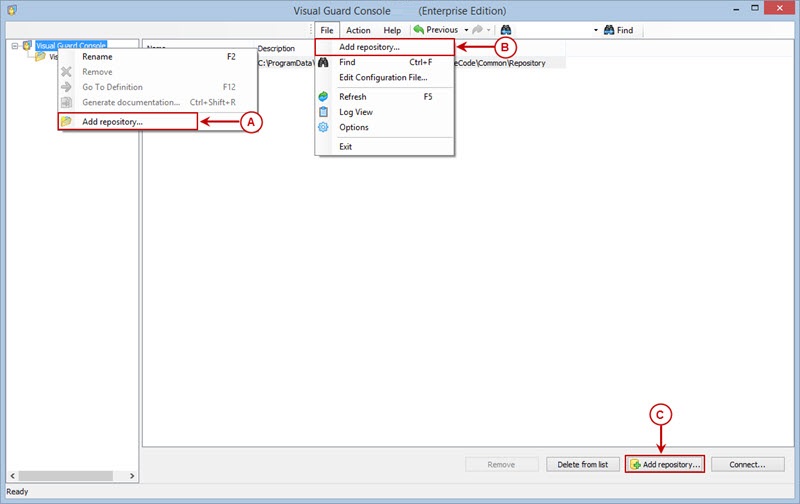
Access the Add Repository option using one of the options below: |
| |
|
|
 |
| Right click on the 'Visual Guard Console' in the Left Navigation Panel and select Add repository option from the Popup Menu. (A) |
|
| |
|
|
Select Add repository option from File Menu (B). |
| |
|
|
Click  (C) (C) |
|
|
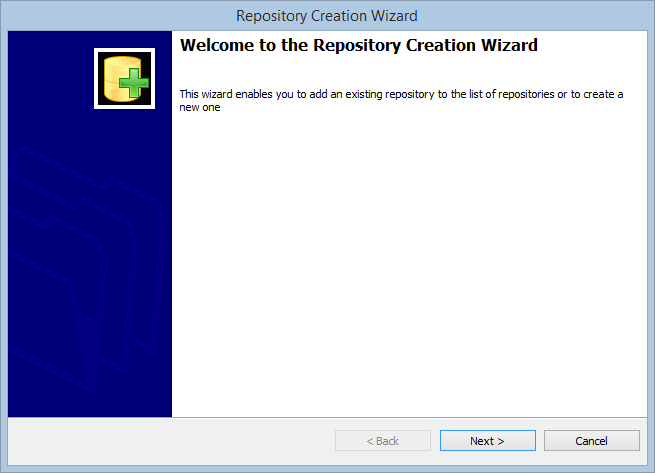
The Repository Creation Wizard screen will be displayed as shown below: |
|
|
| |
Screen Display |
|
|
| |
 |
|
|
|
The wizard will automatically walk you through the repository creation. |
|
Click  to access the Next screen. to access the Next screen. |
|
|
| |
Screen Display |
|
|
| |
 |
|
|
|
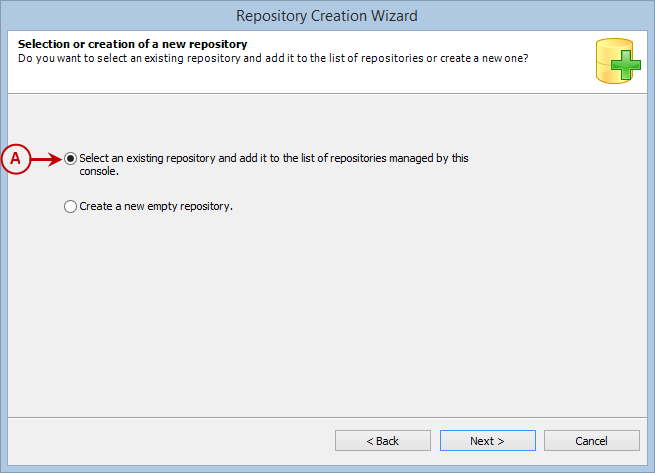
Select the highlighted option (A) from the screen to create a repository using an existing repository. |
|
Click to select repository type. |
|
|
| |
Screen Display |
|
|
| |
 |
|
|
|
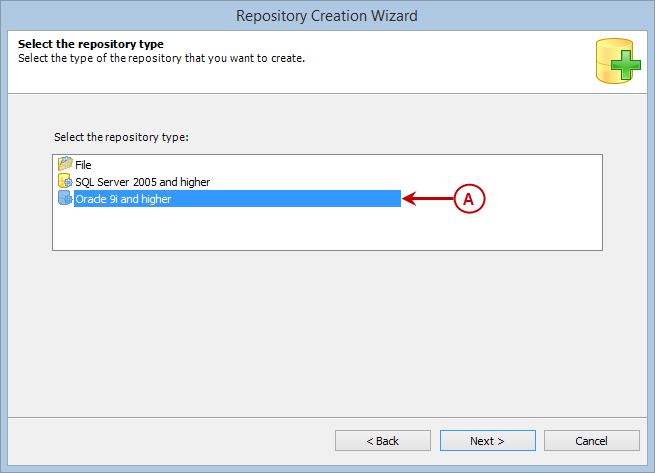
Select option (A) from the screen to create an Oracle Repository. |
|
Click to specify the server name as well as the username and password required to access the repository; the screen below will be displayed. |
|
|
| |
Screen Display |
|
|
| |
 |
|
|
|
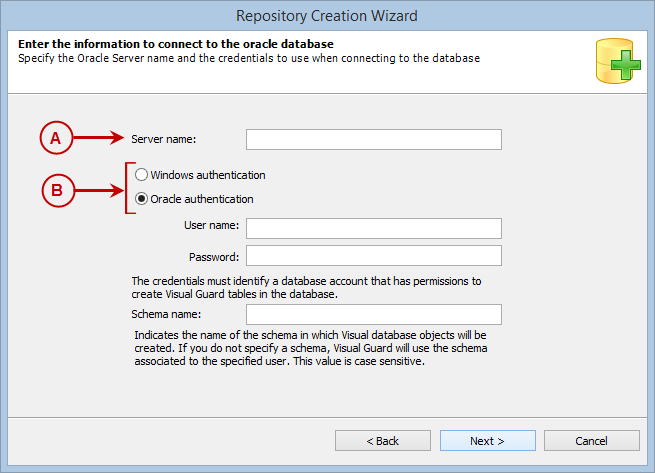
Specify the Server Name in the option (A). This server contains the objects of the database necessary to store the Visual Guard repository. |
|
Select the Authentication Mode (B). |
|
Two types of authentication modes are avaiable namely Oracle Authentication and Windows Authentication Mode (B). |
|
|
| |
Screen Display |
|
|
| |
 |
|
|
|
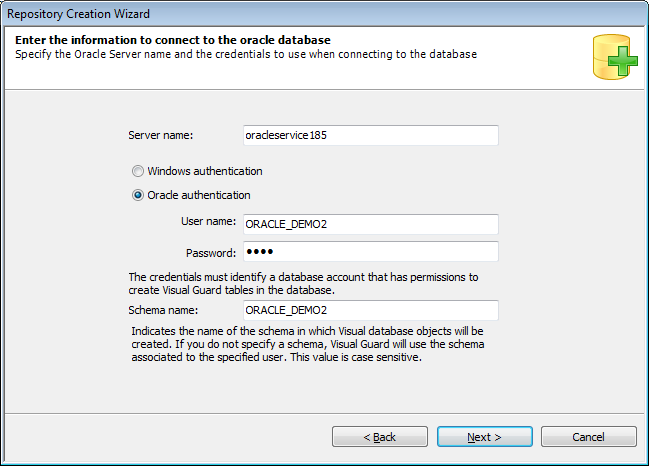
You can select either of the authentication modes. Specify the username and password that will be used to connect to the server. |
|
Specify the schema name. |
|
The schema will be same where the existing repository is stored. |
|
The Authentication Mode selected for the existing repository will automatically be used for the new repository. |
|
Click  to complete the Repository Creation Process. to complete the Repository Creation Process. |
|
Visual Guard will automatically use the Repository Name used last to create the repository. |
|
You can rename the repository on the Visual Guard Console once the creation process is complete. |
|
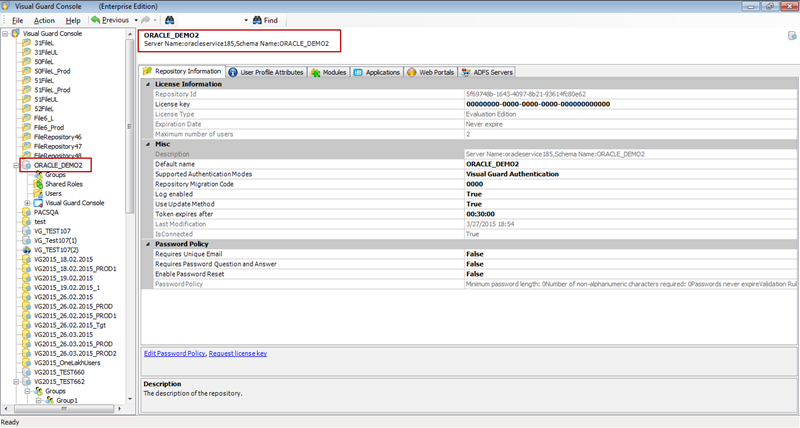
The Repository will be displayed in the Left Navigation Panel as well as the Main Section on the Visual Guard Console. |
|
|
| |
Screen Display |
|
|
| |
 |
|
|
|
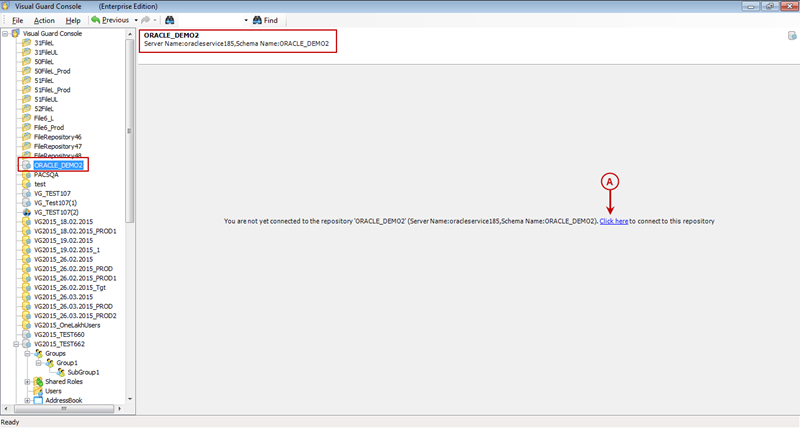
To access the repository, click on the option (A). |
|
The following screen will open and allow you to authenticate and access the repository. |
|
|
| |
Screen Display |
|
|
| |
 |
|
|
|
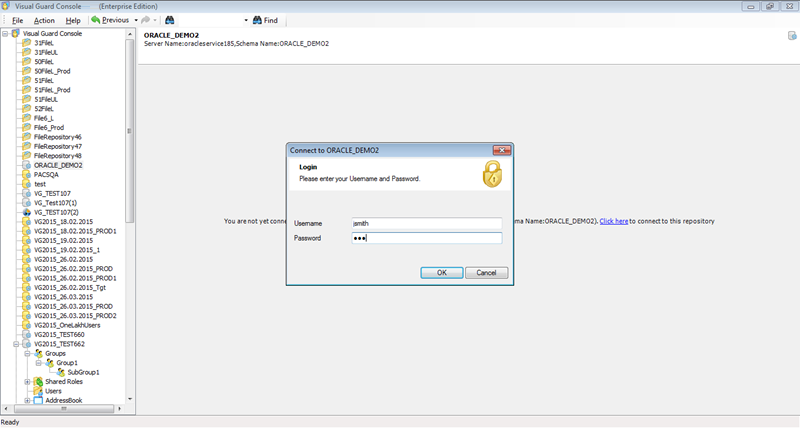
Select the Authentication Mode and specify the username and password. |
|
The following details will be displayed on the Visual Guard Console. |
|
|
| |
Screen Display |
|
|
| |
 |