 |
| Access the VG Win Console application using the path Start > All Programs > Novalys > Visual Guard > Visual Guard Console |
|
|
The VG Win console will open as shown below. |
|
|
| |
Screen Display |
|
|
| |
 |
|
|
|
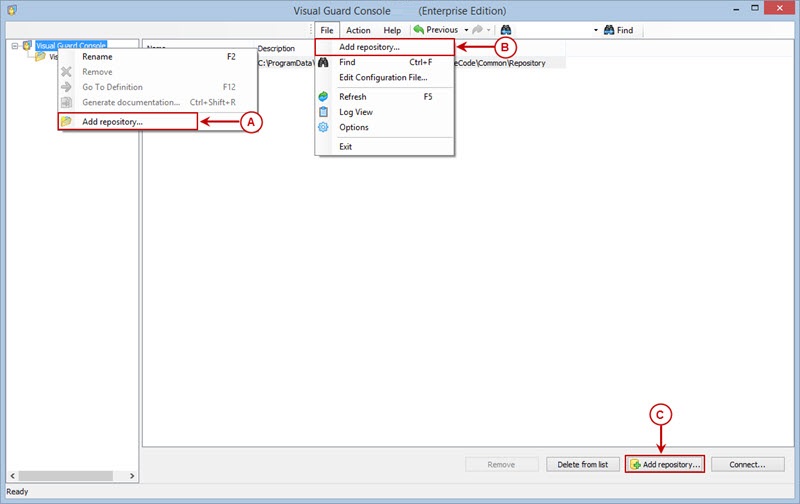
Access the Add Repository option using one of the options below: |
| |
 |
Right click on the 'Visual Guard Console' in the Left Navigation Panel and select Add repository option from the Popup Menu. (A). |
| |
|
|
Select the Add repository option from File Menu. (B) |
| |
|
|
Click  . (C) . (C) |
|
|
|
|
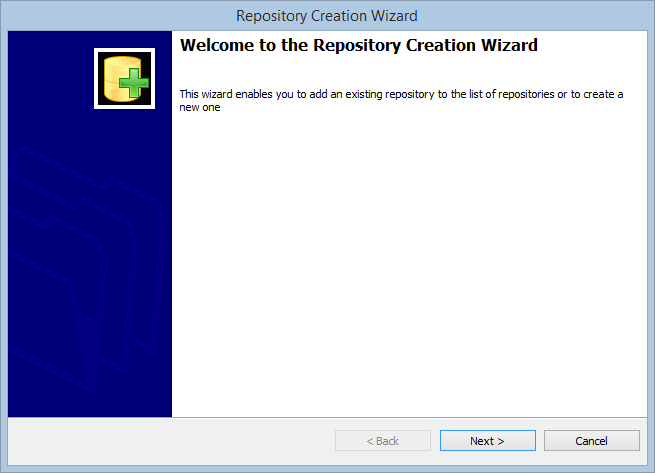
The Repository Creation Wizard screen will be displayed as shown below. |
|
|
| |
Screen Display |
|
|
| |
 |
|
|
|
The wizard will automatically walk you through the repository creation. |
|
Click  to access the Next screen. to access the Next screen. |
|
|
| |
Screen Display |
|
|
| |
 |
|
|
|
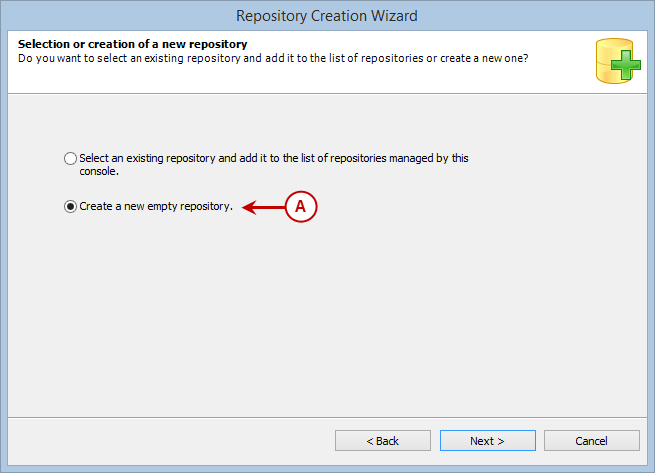
Select the option (A) from the screen to Create a new empty repository. |
|
Click to select the repository type |
|
|
| |
Screen Display |
|
|
| |
 |
|
|
|
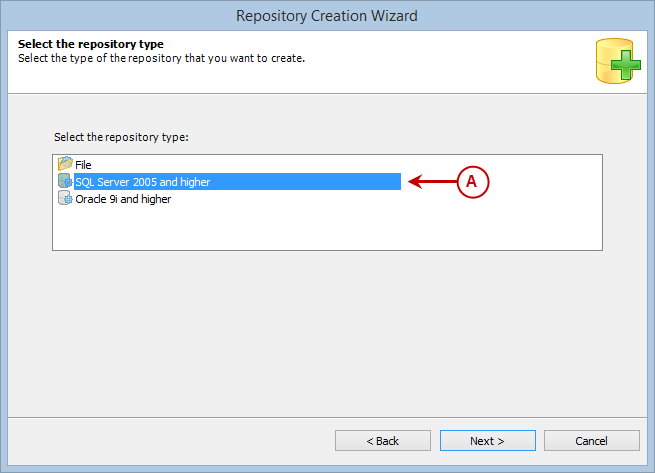
Select option (A) from the screen to create a SQL Server Repository. |
|
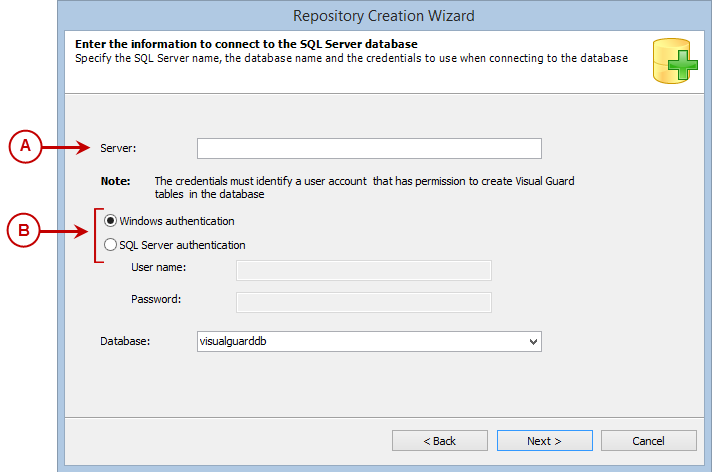
Click to specify the SQL Server name as well as the username and password required to access the repository; the screen below will be displayed. |
|
|
| |
Screen Display |
|
|
| |
 |
|
|
|
Your Database Administrator (DBA) can create database objects manually thanks to a script provided with Visual Guard. |
|
The scripts are in the file <Visual Guard installation directory>\Visual Guard Console\Database\SQLServer |
|
For more information click: |
| |
|
|
Specify the server location in the option (A). You can specify either the IP Address or the Server Name. This server contains the objects of the database necessary to store the Visual Guard repository. |
|
Select the Authentication Mode (B). |
|
Two types of authentication modes are available SQL Server Mode and Windows Authentication Mode (B). |
|
|
| |
Screen Display |
|
|
| |
 |
|
|
|
You can select one of the either authentication modes. Specify the username and password that will be used to connect to the server. |
|
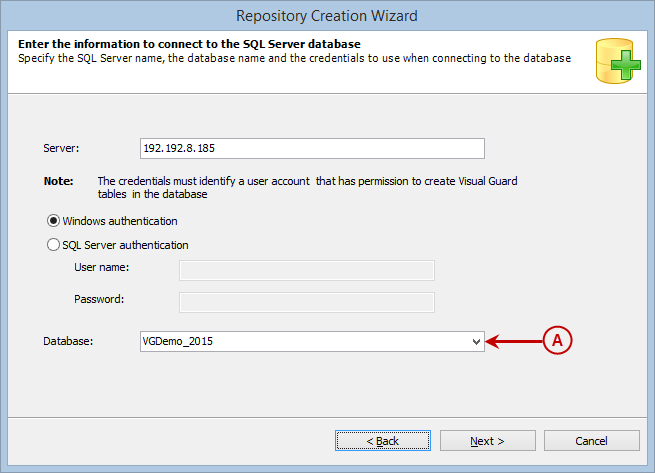
Select the database name or enter the name of the new database where this repository is to be created by using option (A). |
|
Click on the to select Authentication Mode. |
|
|
| |
Screen Display |
|
|
| |
 |
|
|
|
 |
 |
|
 |
|
 |
|
 |
|
| Windows Authentication Mode allows the system to authenticate users using Windows username and password stored in Active Directory i.e. User name and password that has been used to login to the windows system. |
|
|
|
 |
|
 |
|
|
|
|
|
|
|
|
|
|
| Database Authentication Mode allows the system to authenticate users using Database Username and Password i.e. User name and Password that has been used to login to the Database. |
|
|
|
|
|
|
|
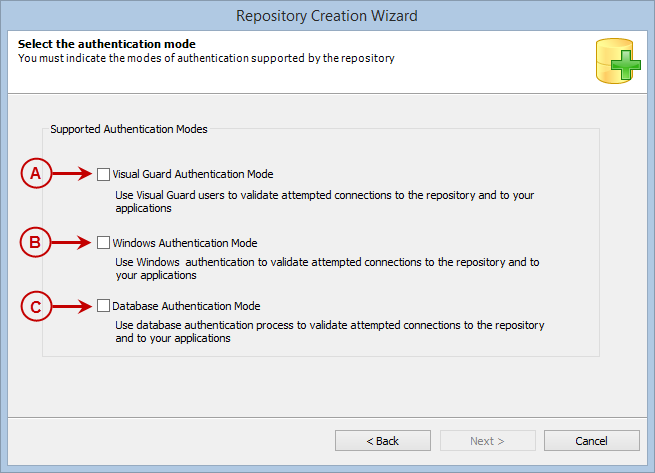
Visual Guard offers three types of authentication modes Visual Guard Authentication Mode (A), Windows Authentication Mode (B), as well as Database Authentication Mode (C) for SQL Server Repository. |
|
|
You can select all three or either of the available options. |
|
|
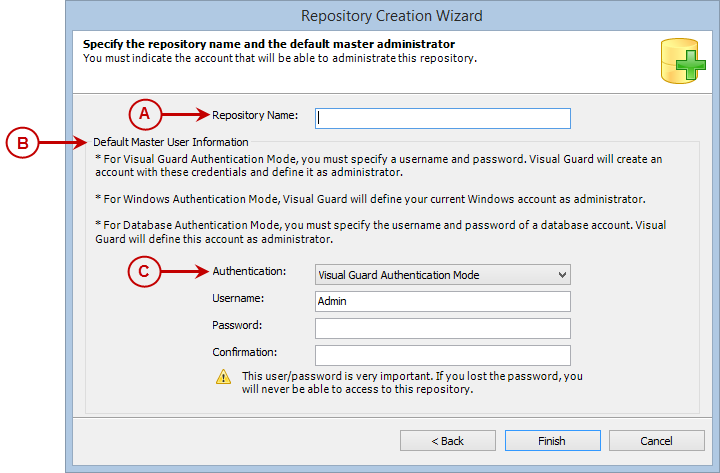
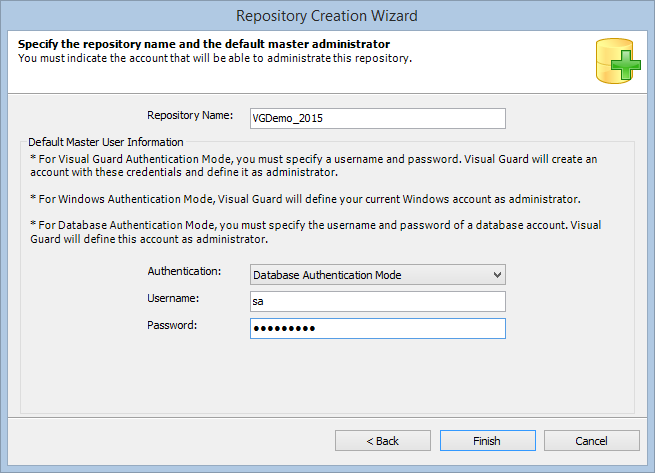
Click to specify the Repository Name and Default Master User Information details. |
|
|
| |
Screen Display |
|
|
| |
 |
|
|
|
Specify the Repository Name in the Repository Name Text Box (A). |
|
Specify the Default Master User Information (B) |
| |
|
Select the Authentication mode (C) for which the account details are to be specified. |
|
The Authentication option (C) will display all Authentication Modes selected by you. |
|
Specify a user name and password. This option will be available in case of Visual Guard Authentication Mode is selected. |
|
In case of Windows Authentication Mode, the current username and password will be automatically used for authentication. |
|
In case Database Authentication Mode is selected then the username and password used to authenticate database should be specified. |
|
|
|
| |
Screen Display |
|
|
| |
 |
|
|
|
Click  to complete the Repository Creation Process. to complete the Repository Creation Process. |
|
Once you click on the Finish Visual Guard will create the structure of the repository in the database. |
|
The user whose details are provided in the above screen will be able to create tables, stored procedures and role in the database. |
|
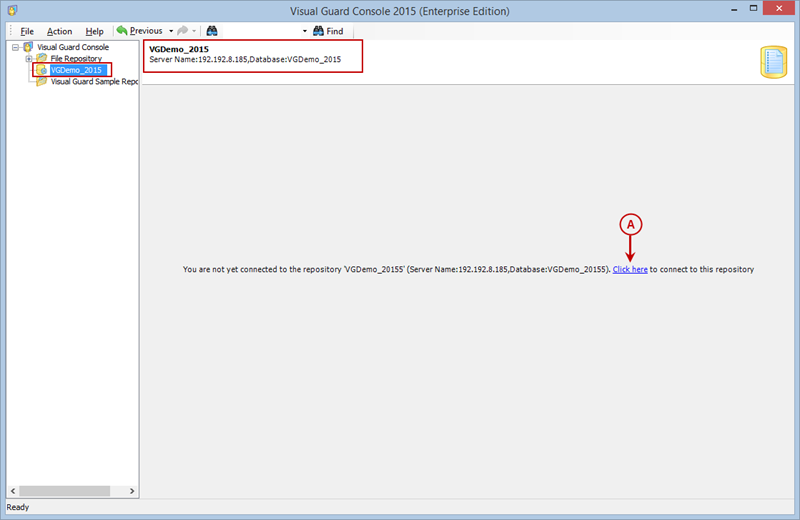
The Repository will be displayed in the Left Navigation Panel as well as the Main Section on the Visual Guard Console. |
|
|
| |
Screen Display |
|
|
| |
 |
|
|
|
To access the repository, click on option (A). |
|
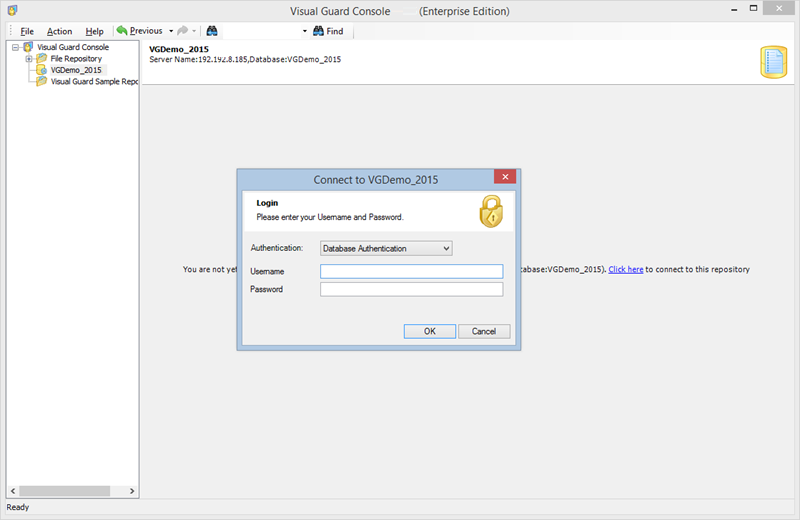
The following login screen will open and allow you to authenticate and access the repository. |
|
|
| |
Screen Display |
|
|
| |
 |
|
|
|
Select the Authentication Mode and specify the username and password. |
|
The following details will be displayed on Visual Guard Console. |
|
|
| |
Screen Display |
|
|
| |
 |